what is a risograph? an introduction
a quick introduction to the risograph
Designed for high-volume and efficient printing, the risograph has become a popular printing method amongst artists and designers for its cost-efficiency and the vibrant inks conventional printers are unable to replicate.
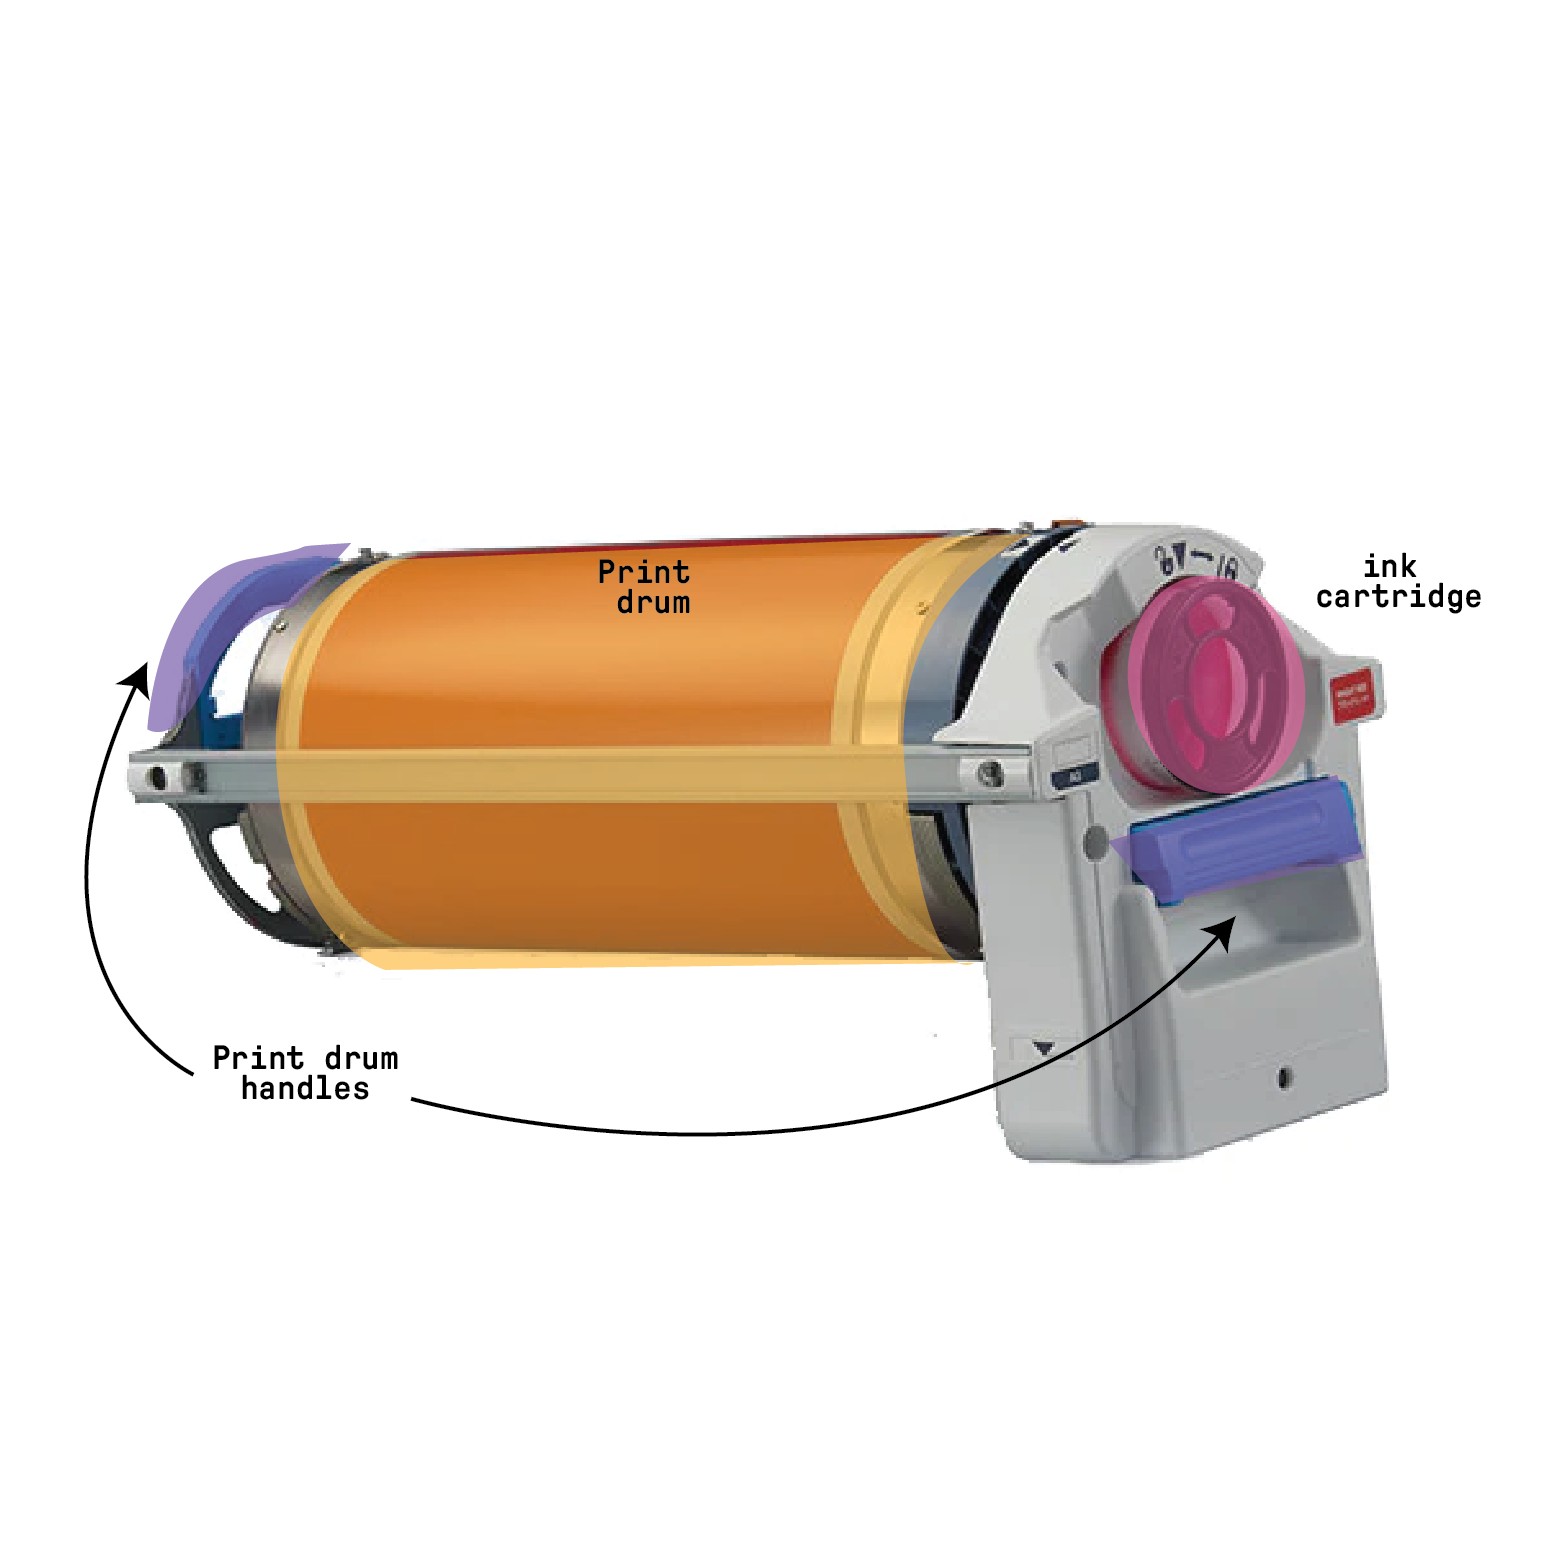
Often introduced as digital screen printing – since the printing process closely mirrors that of a traditional silkscreen printing press, the risograph has gained notoriety for its stellar ability to swiftly transmit design to screen without the tedium of silkscreen processes. These screens are called “masters” – an image generated on a blank stencil sized using thermal heads in the risograph machine. This process is done once for each ink colour used. The same master cannot be used across each ink colour.
Risograph printers operate on a plant-based ink, manufactured using rice bran oil. Rice bran is a byproduct of rice produced in Japan. From the bran, an essential oil is extracted and used to create 70 different emulsion ink colors manufactured by the RISO corporation. (20 standard colours, 50 custom-made speciality colours) On the riso website, the manufacturer boasts that they are the first company to successfully develop the world's first gold and fluorescent inks for the Digital Duplicator. This has drawn many creatives into the world of risograph printing (myself included)
I was a freshman at Parsons when I was introduced to the Risograph printers in the Design lab. Coming away from COVID-19 protocols, the Making Centre was now open to first-year students in the Spring 2022 semester. Its bright colours drew me in (as they usually do- that’s the gateway feature to becoming hooked on the risograph) and the process intrigued me.
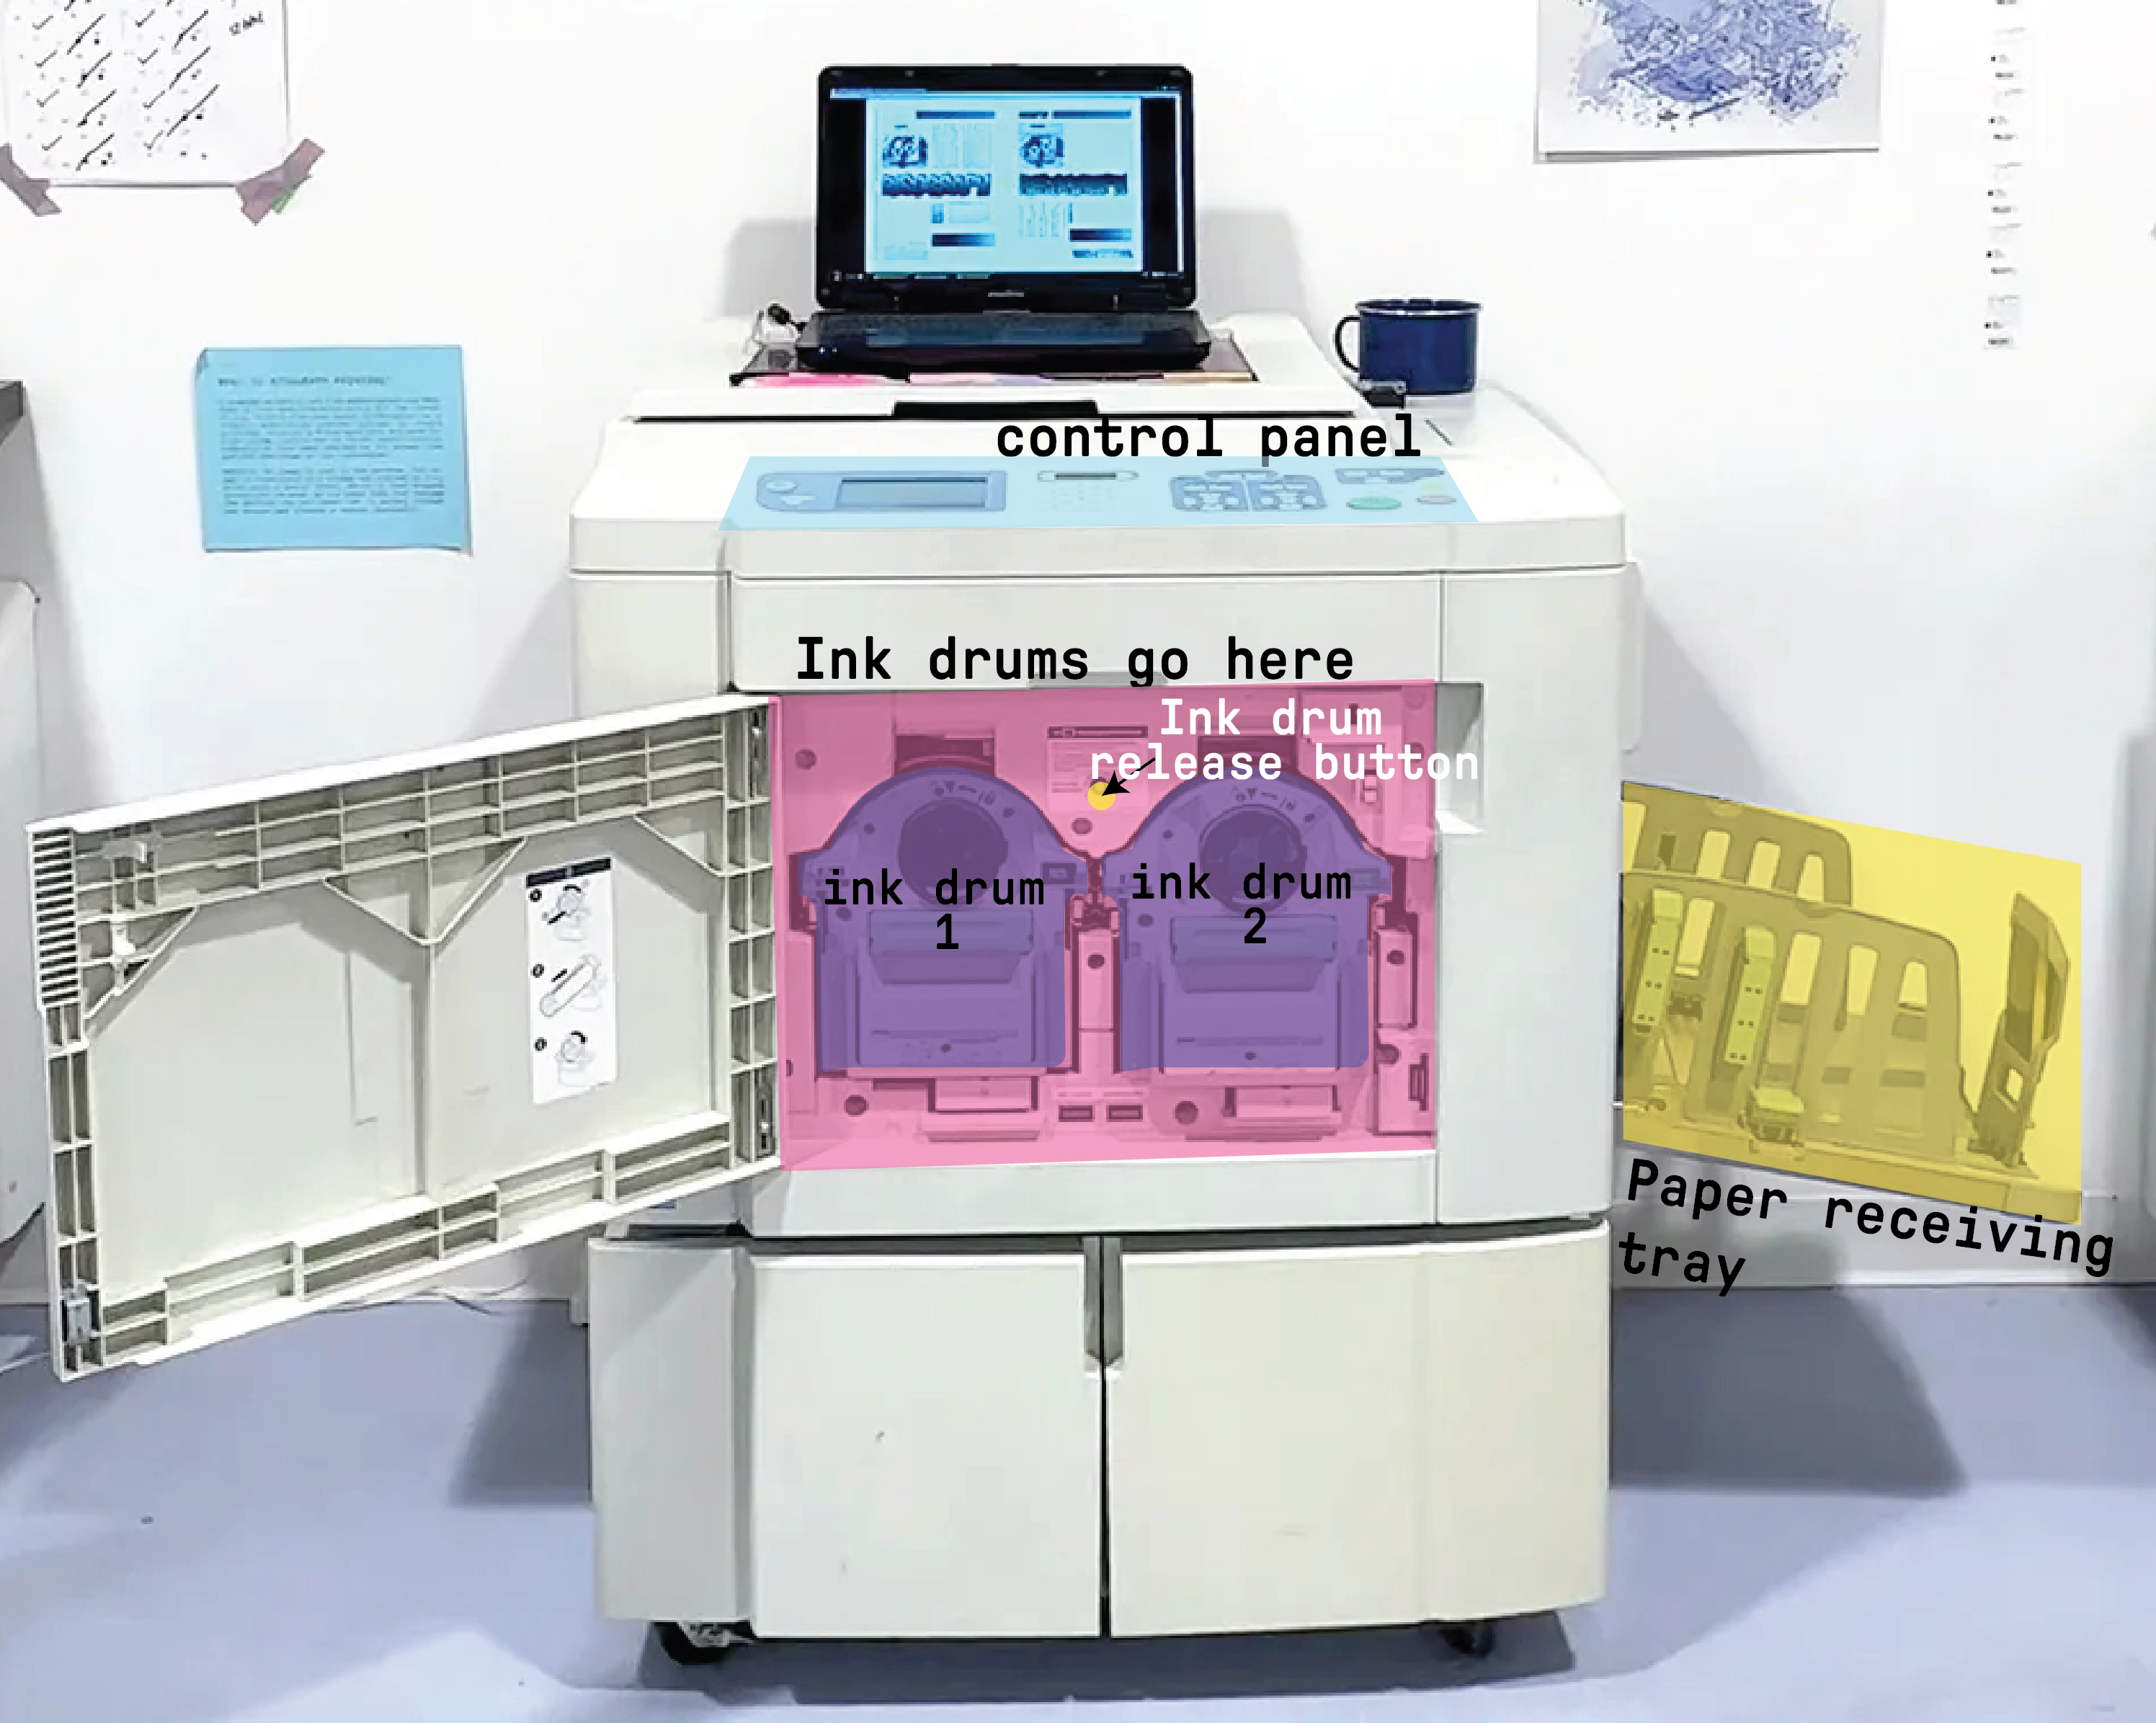
To me, the risograph machine felt like a novelty printing method. The ease of transferring any image to a stencil to print in color from my laptop fought against the constraints of only being able to print one to two colors at once. Digital ease came up short against very tangible limits such as ink saturation and the physicality of handling the risograph ink drums. During the orientation, the techs in the Design Lab impressed upon us the importance of gently handling the ink drums, so as not to break them. Aligning and registering the colors were also a tested skill, one that still takes time to perfect and changes with each print.
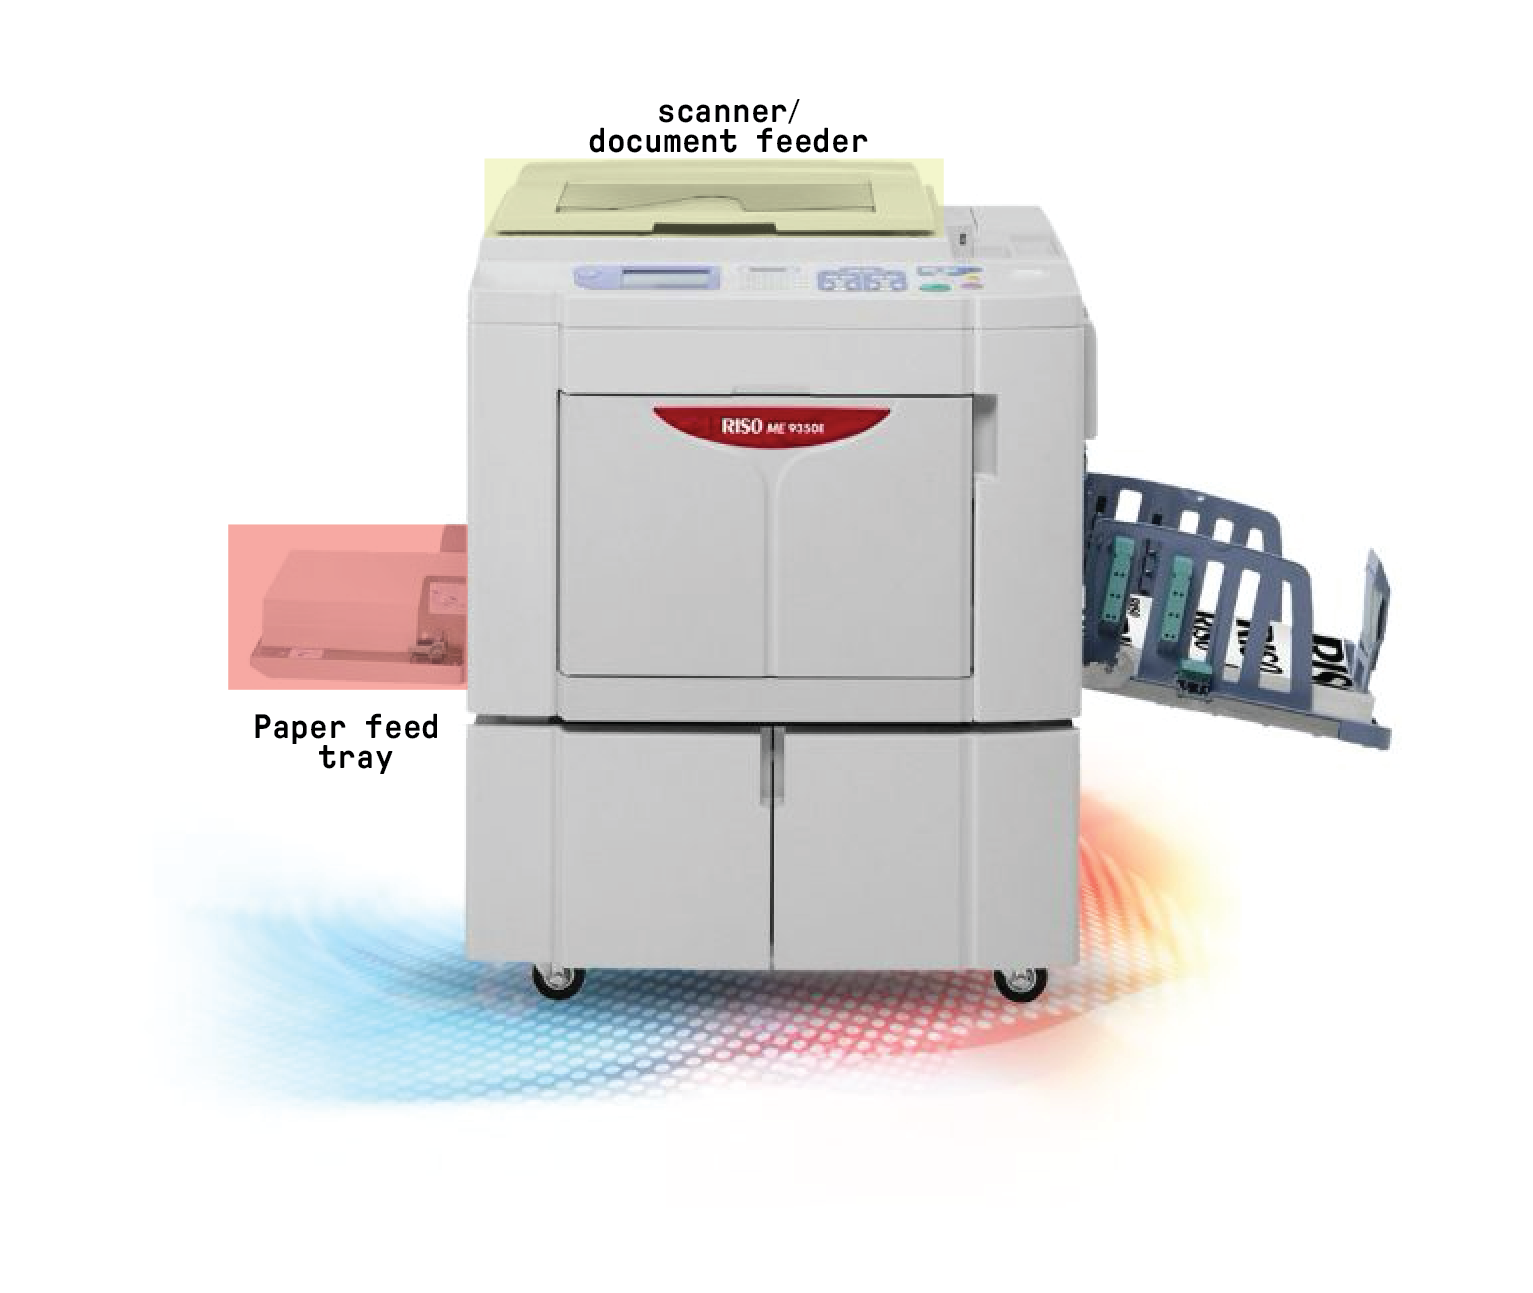
The Anatomy of a Risograph Printer (dual-colour printer)
How it Works
- Design file is set up
- This entails splitting the design into different, single-colour layers (almost like CMYK printing) since only 1 color can be processed at a time
- Load paper into the paper feed tray.
- A colour layer of design is sent to the printer through the printing module on the computer (usually through Adobe Photoshop or a PDF file)
- In this module, you can also typically select the image rendering method of the design (grain touch for photographs, screen-like rendering etc) since the process of creating a master is like creating a screenprint.
- The master is made by processing it on the control panel. A proof print is typically printed as well.
- Repeat the process for the second colour (if printing more than 1 colour)
- print (quantity selected on control panel!)
- Align both ink colours using the control panel buttons.
- Adjust ink density, printingg speed
- once satisfied, keep printing your desired quantity!
- repeat for every risograph print you ever make
- enjoy!